Carpets are one of the best floor coverings to add vibrancy, depth, and character to the interiors. Besides, they provide a soft and comfortable surface to land your feet. They come in amazing designs and durable textures but can get damaged due to numerous reasons like stubborn stains, spills, pet scratches, burns, etc.
If you’ve got one such visually damaged carpet and want to fix it, a carpet with carpet patching might be what you’re looking for. It’s an ideal solution to fix carpet damage confined to small areas i.e. less than one foot in length. In today’s blog at Carpet Supplier, we’ve explained what carpet donor patching is and how can you DIY restore the visual appeal of your damaged carpet.

The Simple Technique To DIY Repair A Carpet With Carpet Patching
You don’t need to call a carpet technician to patch your carpet and it can be done DIY with ease. For this purpose, you need to cut the damaged area of the carpet in a defined shape and replace it with a donor patch of the same size and color. Let’s unveil the trick to apply donor patches and repair damaged carpets.
What Is A Donor Patch?
A donor patch is a part of the carpet that’s available since you last installed the carpet. Basically, it’s the remnants of your existing carpet or you can order the same carpet patch from your supplier by tracing the order details in their system.
New Donor Patches
There are two ways to fix a damaged carpet i.e. new donor patches and existing carpet cutouts. For new donor patches, you need to hunt your house for carpet remnants from the time of carpet installation. You could have placed them in the garage, attic, or basement area if you’ve saved them just in case the carpet gets damaged.
Otherwise, it’s sometimes possible to purchase a patch of the same carpet from your carpet provider. For this purpose, you need to provide the carpet details like style, texture, pile height, etc. And, if you expect to purchase a carpet patch just by showing the picture of it, there’s a high chance of mistake in color shade. No need to mention that a slightly wrong carpet tone and it’s noticeable.
Existing Carpet Cutouts
If you’re unable to find the new donor patches and that mostly happens, you need to cut small pieces of your existing carpet from specific and unnoticeable places. For instance, it can be from under furniture that you’re not going to move at all like a media cabinet. Or else, enclosed staircases, under beds, furnace closets, etc all are good choices to take carpet cutouts for a patch.
Tools & Materials Needed
- Seam Roller/Old Comb
- Carpet Knife/Utility Knife
- Donor Carpeting
- Double-sided Adhesive Tape
1. Evaluate The Damage
The donor patch is best for small-scale carpet damage that is not more than 1 foot in size. If your carpet damage is significant and not confined to one space, it’s better that you consider re-carpeting the entire area. For frayed, worn, and scorched carpets, donor patching is best applicable and most effective repair method.
2. Mark The Damaged Carpet Section
You must define the damaged section of the carpet using a capped pen. For this purpose, press the pen firmly against the carpet fabric and mark a definite line that separates the damaged section of the carpet.
3. Get The Donor Patch
As already described, the donor patch is either your existing carpet cutout or an unused remnant since the time of carpet installation. Don’t forget that the donor patch should be visually the same in color, design, and pile height.
Otherwise, you’ll end up with a visually noticeable patch that does affect the appeal of your carpet. Don’t forget that your carpet patch should be cut in a somewhat large size so that size adjustments can be made after you place the patch over the damaged section of the carpet. Because as you know an oversized patch can be fixed/altered but there’s no remedy for a small-sized carpet patch and it’s of no use.
4. Cut The Damaged Section of Carpet
Now, it’s time to carefully cut the damaged section of the carpet using a utility knife. Here, you should be careful about not pulling the carpet fabrics and only cutting the carpet backing for ease of removal of that carpet section.
5. Experiment With Donor Patch Placement
Before you cut the donor patch, it’s necessary that you lay it over the existing carpet cutout section for an impression. Again, you should use a capped pen to mark the lines determining the extra part that should be cut around the patch.
6. Apply The Double-Sided Adhesive Tape
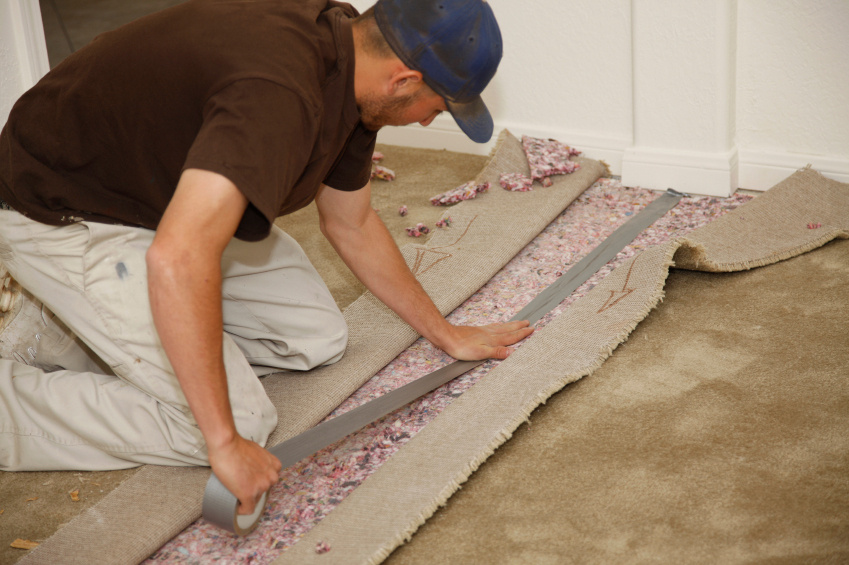
Carpet double-sided tape is extremely sticky and you should carefully apply it around the borders of the damaged carpet section. For this purpose, you can place protective paper around the borders and apply the adhesive tape. This is done to ensure that the adhesive tape doesn’t get attached to the carpet fabrics right away.
7. Apply The Patch
Finally, it’s time to apply the carpet patch in place, and in doing so, you need to remove the protective paper from the borders of the damaged carpet section. Don’t forget to firmly press the carpet patch for proper attachment.
8. It’s Time For The Carpet Roller
Now, you just have to blend the carpet patch with the rest of the carpet and it can be done using the carpet roller, comb, or even a dry cloth. However, we recommend using a carpet roller and running it all over the carpet in all directions to effectively blend the fabrics at the borders of the applied donor patch.
Is There A Need To Call A Professional?
For damaged carpeting repair, one should hire professionals when there is significant damage and more than one section is to be repaired. Because under such circumstances, the only remedy is re-carpeting the entire area.

The Conclusion
Repairing carpet damage using a donor patch is an inexpensive, efficient, and simple technique. You need to find unused carpet remnants or get an existing carpet cutout for this purpose and follow the steps explained in this blog post for desirable results. And, you must arrange all the tools and materials to alleviate probable problems during the procedure.


